TOPIC
A Comprehensive Guide To Appliance Recycling In Honolulu, HI
Recycling old appliances can be a challenge, especially in a city like Honolulu, HI. With specific rules and unique programs, understanding how to handle the process is essential for keeping the island beautiful.
Whether you’re a resident or a newcomer, this guide will walk you through everything you need to know. Ready to make a difference? Read on to get enlightened.
Why Appliance Recycling In Honolulu Matters
Appliance recycling in Honolulu is critical for both environmental and community well-being. By recycling, you reduce the strain on landfills and prevent hazardous materials from polluting the island. Items like refrigerators and air conditioners contain chemicals that can harm ecosystems if not disposed of properly.
The community also benefits when you recycle appliances. Recycling programs often support local jobs and resource recovery. Scrap metals and reusable components can be repurposed, creating economic value. This helps Honolulu maintain a sustainable and thriving economy.
What’s more, responsible recycling protects the island’s natural beauty. Hawaii’s landscapes attract millions of visitors annually, and proper waste management keeps beaches, forests, and urban areas pristine. This ensures that future generations can enjoy Honolulu’s unique environment.
Laws And Regulations For Appliance Recycling In Honolulu
Honolulu enforces strict regulations for recycling large appliances to protect the environment. Appliances like refrigerators and air conditioners must not be left on the curb without a scheduled bulky item pickup. Violating these rules can result in fines.
Federal and state laws, including the Clean Air Act, govern the handling of hazardous materials in appliances. Honolulu requires residents to remove substances like Freon before recycling, using certified professionals or designated centers. These regulations prevent harmful chemicals from contaminating the island’s air, soil, and water.
The city supports compliance through educational programs and accessible resources. Residents can find detailed recycling guidelines and pickup schedules through Honolulu’s official website. Adhering to these rules safeguards the environment and contributes to a healthier community.
Honolulu’s Appliance Recycling Program: What You Need To Know
Honolulu offers a variety of programs to make appliance recycling simple and accessible. The city’s bulky item collection service is a popular option. Residents can schedule pickups for appliances like refrigerators, stoves, and washing machines. This service helps residents dispose of items without extra hassle.
For larger appliances, Honolulu’s appliance recycling program often involves fees. Some programs charge a small amount to handle hazardous materials like Freon. However, these fees are worth it for the convenience and environmental benefits they provide.
Additionally, Honolulu emphasizes sustainability in its recycling efforts. Partnerships between local governments and private recyclers help streamline the process. Understanding these programs can save time and effort, making appliance recycling more efficient.
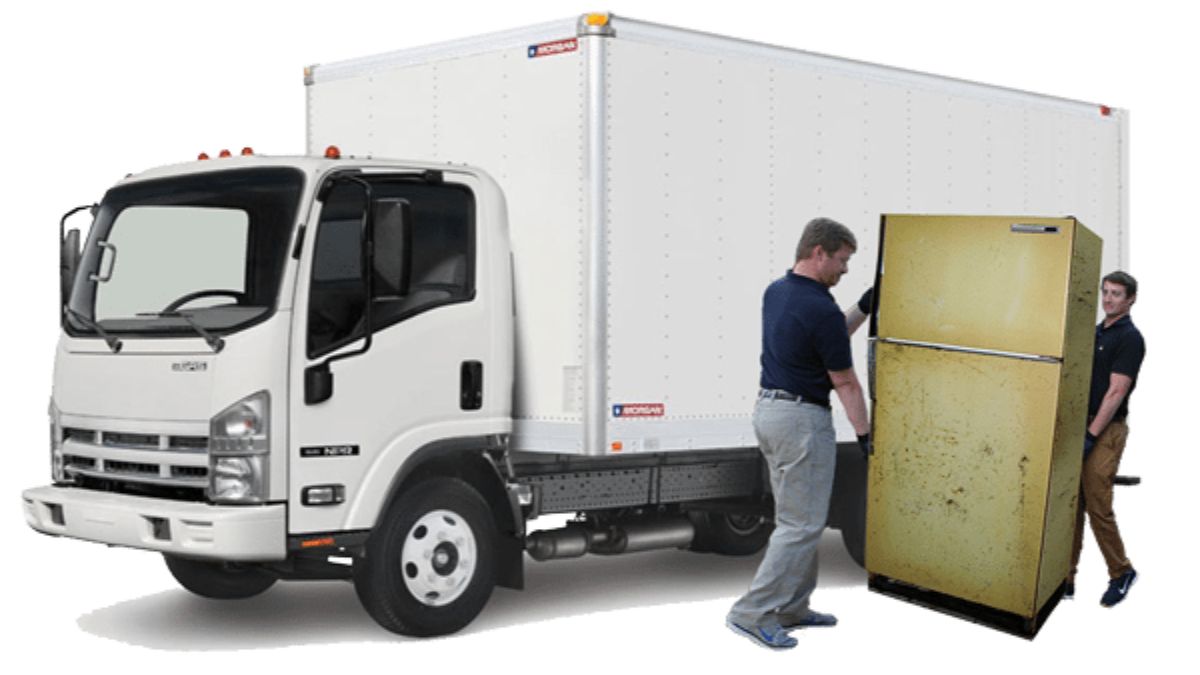
Preparing Your Appliances For Recycling In Honolulu
Getting your appliances ready for recycling is a crucial step. Start by unplugging and emptying the appliance. For refrigerators, remove all food, shelves, and loose parts to ensure the item is safe for transport.
Next, check for hazardous components. Many appliances, such as air conditioners and refrigerators, contain refrigerants that need special handling. Be sure to follow Honolulu’s guidelines for safely removing these materials or hire a professional to assist.
Lastly, clean the appliance thoroughly. Removing dirt, grease, and debris makes it easier for recycling centers to process your items. A clean appliance is also safer to handle during transportation.
Types Of Appliances Accepted For Recycling In Honolulu
Honolulu’s recycling centers accept a wide range of appliances. Common items include refrigerators, washing machines, and dishwashers. These large appliances often contain valuable metals that can be recovered and reused.
Small appliances, such as microwaves and toasters, are also accepted at many facilities. However, it’s essential to check each center’s guidelines. Not all locations handle small electronics or battery-operated items.
Certain appliances require special handling. Air conditioners and dehumidifiers, for instance, contain refrigerants that need to be safely removed. Always verify the requirements for these items before recycling them.
How To Locate Free Or Low-Cost Recycling Events
Honolulu regularly hosts free or low-cost recycling events to encourage community participation. These events are often advertised on the city’s official website and social media platforms. Residents can recycle appliances and other items without incurring significant costs.
Events typically partner with local businesses and non-profits to maximize outreach. They offer services such as bulk collection and hazardous material removal. Participating in these events reduces the financial burden of recycling while promoting sustainability.
Attending recycling events also provides an opportunity to learn about new programs and initiatives. Many events feature workshops and informational booths. This helps residents stay informed about best practices for appliance disposal.
Common Challenges In Appliance Recycling And How To Overcome Them
Recycling appliances in Honolulu comes with its share of challenges. For instance, transporting heavy items is a common issue. To solve this, consider using a dolly or hiring professional movers.
Another challenge is understanding the city’s recycling guidelines. Complex rules can be confusing, but resources like Honolulu’s official website offer clear instructions. Staying informed prevents mistakes and ensures compliance.
Lastly, disposal fees can deter some residents. While these fees cover essential recycling services, budgeting for them in advance can ease the burden. Look for promotions or free drop-off events to save money.
Benefits Of Professional Recycling Services In Honolulu
Using professional recycling services can streamline the appliance disposal process. These companies handle everything from transportation to safe disposal. Professional services ensure that appliances are recycled according to local and federal regulations.
Hiring experts also reduces risks associated with improper disposal. Professionals are trained to handle hazardous materials, preventing environmental contamination. Additionally, their services often include documentation for compliance with recycling laws.
For residents with multiple items to dispose of, professional services can be a cost-effective option. Many companies offer bulk discounts and flexible scheduling. This makes it easier for households to manage appliance recycling without inconvenience.
How to Find Appliance Recycling Service Providers
Finding a reliable appliance recycling service provider in Honolulu doesn’t have to be complicated. Start by searching online for local companies specializing in appliance disposal. Many providers list their services and fees on their websites, making it easy to compare options.
Another great way to find service providers is by checking city resources. Honolulu’s official website often features a directory of approved recycling companies. This ensures you’re working with licensed and reputable professionals.
Finally, ask for recommendations from friends or neighbors. Word-of-mouth referrals can point you to trustworthy providers with excellent customer service. With a little research, you’ll find a service that fits your needs.
Alternatives To Recycling: Reuse And Donation Options
Sometimes, recycling isn’t the only solution. Many functional appliances can be reused or donated. Organizations like the Salvation Army and Habitat for Humanity accept working appliances and redistribute them to those in need.
Another option is to repurpose old appliances creatively. For instance, an old refrigerator can become a storage unit or be upcycled into a quirky garden planter. These projects reduce waste and add character to your home.
If donating or repurposing isn’t feasible, consider selling your appliance. Online marketplaces like Craigslist or Facebook Marketplace are great platforms for finding buyers in Honolulu. This approach extends the life of your appliance while benefiting someone else.
Takeaway
Recycling appliances in Honolulu plays a vital role in protecting the environment and maintaining the island’s beauty. By understanding the city’s programs and regulations, residents can ensure proper disposal while supporting sustainability. Whether recycling, donating, or repurposing, these efforts contribute to a cleaner, healthier community and a thriving local economy
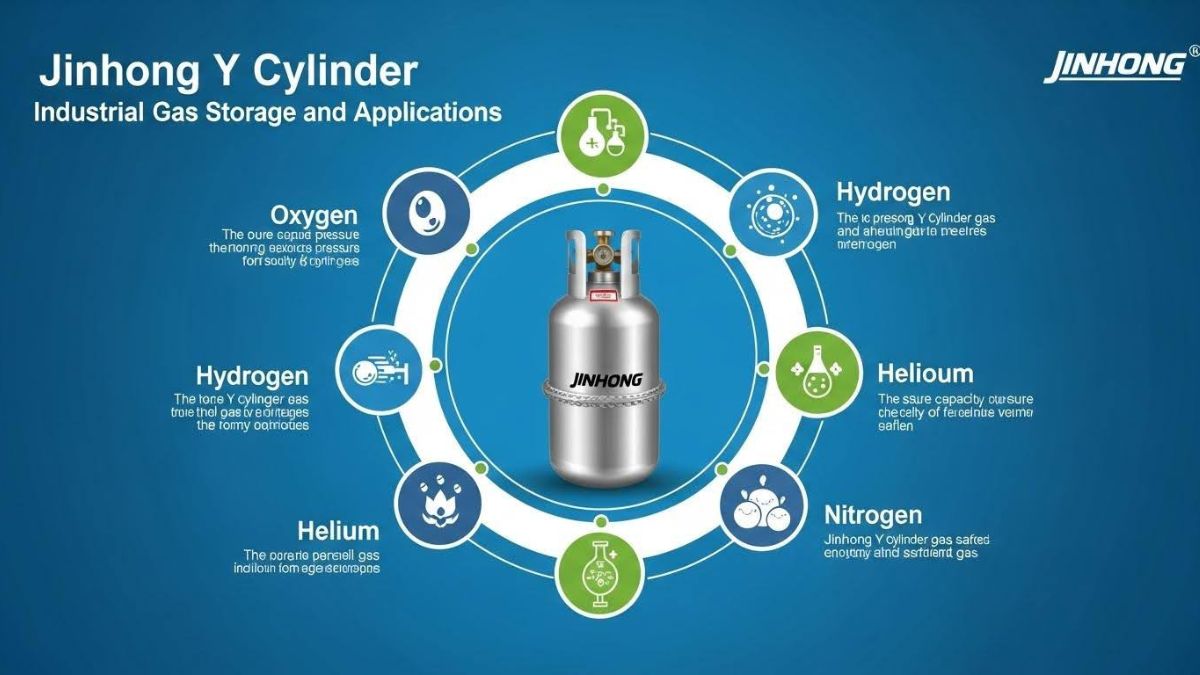
In industrial and laboratory environments, the need for reliable gas storage solutions is crucial. Among the many formats available, the Jinhong Y cylinder stands out as a high-capacity, high-pressure gas container designed for efficient storage and transport of specialty gases. With an emphasis on purity, performance, and safety, Y cylinders are trusted by industries ranging from semiconductors and laboratories to petrochemical plants and aerospace operations.
This article takes a deep dive into the design, specifications, applications, and advantages of the Jinhong Y cylinder, while also shedding light on the broader offerings of Jinhong, a global player in the specialty gas and cylinder market.
What Is a Y Cylinder?
A Y cylinder—sometimes referred to as a “ton container” or “T cylinder”—is a large, horizontal gas cylinder used to store and transport gases in bulk, especially under high pressure. These cylinders are ideal for gases that are either costly or consumed in large volumes, such as:
- Sulfur hexafluoride (SF₆)
- Silane (SiH₄)
- Ammonia (NH₃)
- Chlorine (Cl₂)
- Hydrogen chloride (HCl)
Y cylinders are constructed using high-strength steel or other reinforced materials and come equipped with pressure relief valves, gas-specific valve types, and neck threads tailored to the properties of the stored gas.
Dimensions and Specifications of Y Cylinders
Though specifications may vary slightly by manufacturer, Jinhong’s Y cylinders typically follow global standards for gas container design. Here are some standard specifications:
| Specification | Typical Value |
| Water Capacity | 49.5 – 52.5 liters |
| Working Pressure | Up to 150 bar (depending on gas) |
| Material | Seamless steel |
| Cylinder Orientation | Horizontal |
| Cylinder Weight | ~90 – 110 kg (empty) |
| Certification Standards | ISO9809, DOT, TPED, GB, etc. |
These cylinders are built to resist corrosion, handle hazardous contents, and ensure long-term durability under demanding industrial conditions.
Why Choose the Jinhong Y Cylinder?
Jinhong, a trusted name in the specialty gas industry, has a reputation for producing high-quality gas cylinders and supplying ultra-high purity gases to global markets. Their Y cylinders stand out due to the following reasons:
1. High Storage Capacity
Compared to standard industrial cylinders, Y cylinders provide significantly more gas per unit, reducing the frequency of cylinder changes and minimizing downtime.
2. Safety Compliance
Every Jinhong Y cylinder complies with international safety codes, ensuring that gases are safely stored and transported. From valve compatibility to explosion-proof construction, these cylinders are designed for handling toxic, corrosive, or flammable gases.
3. Versatility Across Industries
Whether it’s used in a semiconductor cleanroom or a chemical processing facility, the Y cylinder can handle diverse gases without compromising purity or safety.
4. Customization Options
Jinhong offers a range of customizable features for its Y cylinders, including:
- Valve type (Diaphragm, Ball, Needle)
- Gas purity levels
- Color-coded coatings
- Stamped serial numbers for traceability
Industrial Applications of Y Cylinders
Y cylinders are essential in sectors where gas consumption is high and continuous. Let’s explore their role across a few industries:
Semiconductor Industry
Gases like silane (SiH₄), ammonia (NH₃), and hydrogen chloride (HCl) are delivered in Y cylinders to semiconductor fabs. Their large volume capacity ensures consistent feedstock supply for chemical vapor deposition (CVD) and etching processes.
Chemical Manufacturing
In chemical synthesis and polymer production, bulk gases are used in continuous-flow reactors. Y cylinders reduce gas replacement frequency and ensure stable operations.
Power and Utilities
Sulfur hexafluoride (SF₆) is a common gas used for insulation in high-voltage switchgear. SF₆ is often stored in Y cylinders due to the quantity required for substations and grid systems.
Metallurgy and Welding
Some specialty gases used in high-end alloy processing and thermal spray coatings are stored in Y cylinders to maintain purity and minimize contamination risks.
Jinhong: Beyond Cylinders
Jinhong isn’t just a cylinder manufacturer—it’s a global supplier of industrial and specialty gases. From argon to acetylene, Jinhong provides gases for welding, medical, research, and semiconductor sectors.
Interested in pricing on one of Jinhong’s most popular gases? You can explore cost breakdowns for commonly used products like argon here: Jinhong
This pricing insight is helpful whether you’re sourcing gases in bulk or planning an industrial-scale project.
Maintenance and Safety Tips
Proper handling and maintenance of Y cylinders are essential to avoid hazardous situations:
- Store upright in well-ventilated areas
- Use regulators and fittings specific to the gas type
- Perform leak checks before each use
- Never attempt to refill or modify cylinders without professional certification
- Always follow SDS (Safety Data Sheet) instructions for each gas
Jinhong provides comprehensive safety documentation and training resources for all its products, including Y cylinders and the gases they carry.
Cost Considerations
While Y cylinders require a higher upfront cost compared to standard cylinders, they offer better cost-efficiency over time due to:
- Fewer cylinder changes
- Reduced shipping and handling
- Lower downtime in continuous processes
In bulk supply scenarios or semiconductor facilities, Y cylinders can lead to significant cost savings when calculated on a per-liter or per-gram gas usage basis.
Global Standards and Certification
Jinhong’s cylinders conform to key international standards, including:
- ISO 9809 for seamless steel cylinders
- DOT/TC certification for U.S. and Canadian markets
- TPED/ADR compliance for Europe
- GB standards for China
This makes them an ideal choice for companies operating in regulated industries and across global markets.
Conclusion
The Jinhong Y cylinder represents a critical innovation in industrial gas storage, offering bulk capacity, high-pressure tolerance, and unmatched safety. Whether you’re in semiconductor fabrication, chemical processing, or energy infrastructure, this cylinder format is built to support high-performance applications while ensuring operational efficiency.
Jinhong’s commitment to quality, global distribution, and innovation in specialty gases has made them a go-to supplier for businesses around the world. If you’re looking to invest in reliable, certified, and high-capacity gas storage, the Y cylinder may be exactly what your operation needs.

Motorcycle crashes impact lives. When poor road conditions cause these accidents, you may wonder about filing a claim. Understanding your rights helps you make informed decisions. Bad roads, such as those with potholes or debris, present unique challenges for riders. These hazards can lead to devastating outcomes. You may think, “Who is responsible?” That’s a fair question. State or local governments often manage road upkeep. If they neglect maintenance, they might be accountable. But proving this requires evidence and expertise. Consulting experienced professionals is crucial. Groth Law Accident Injury Attorneys is a trusted resource in such situations. They guide you through the legal process. Gathering evidence, such as photos or witness testimonies, strengthens your case. Awareness of these steps can protect your future. You deserve justice when harmed due to someone else’s negligence. Understand your options. Knowledge empowers you to seek rightful compensation. Let’s uncover what action you can take.
Your Legal Rights and Responsibilities
When faced with a motorcycle crash caused by poor road conditions, knowing your rights is the first step toward resolution. Do you have a claim? Yes, if negligence on the part of road maintenance entities contributed to the crash. It’s critical to determine if the government is responsible for the road’s condition. Understanding regulations helps you establish a claim. For instance, Federal Highway Administration provides guidelines on road maintenance. Knowing these can help you understand where negligence occurred.
Proving Negligence in Motorcycle Crashes
To succeed in a claim, you must prove negligence. This involves showing that the responsible party knew or should have known about the hazard. Gathering evidence is essential. You need clear proof that links the road condition to your crash. Photos, reports, and witness statements play a vital role. Document everything, including the location, time, and specific conditions of the road. These details create a strong foundation for your claim.
Steps to File a Claim
Filing a claim involves several steps. First, report the accident to authorities. Accurate police reports can aid your case. Then, seek medical attention. Health records not only ensure your well-being but also serve as evidence of your injuries. Afterward, consult legal experts. They guide you through the intricate legal process. Experts can help you notify the responsible government entity of your intent to file a claim. It’s important to meet all legal deadlines, as missing them can jeopardize your case.
Understanding Liability
Determining liability in these cases can be complex. The table below outlines possible responsible parties and their typical maintenance duties:
| Responsible Party | Typical Maintenance Duties | When Liability May Apply |
| Local Governments | Maintain city streets | When city roads are neglected |
| State Governments | Maintain highways | When highways have hazards |
| Federal Agencies | Oversee federal routes | When federal routes are unsafe |
Importance of Expert Guidance
Expert guidance is invaluable. Legal professionals understand the nuances of such claims. They assess your situation and offer advice tailored to your needs. With their help, you can navigate the complexities of the legal system. This support can be a significant relief, ensuring your rights are protected.
Taking Action
Act promptly. Time matters in these cases. Evidence can disappear, and legal deadlines can pass quickly. By acting swiftly, you preserve your rights and enhance your chances of success. Stay informed and proactive throughout the process. Your diligence can make a substantial difference in the outcome.
Conclusion
Motorcycle crashes are life-altering events. When poor road conditions cause these incidents, you have the right to seek justice. Proving negligence requires careful documentation and expert assistance. By understanding your rights and taking informed steps, you can pursue rightful compensation. Remember, you are not alone. There are resources and professionals ready to guide you through this challenging time. Your well-being and future matter. Take control and act today.

Kidnapping is a terrifying crime that can happen to anyone. Children and adults are often targeted. It is necessary to communicate with private investigators in OKC and process servers near me who have worked on multiple kidnapping cases. Their knowledge about kidnapping cases reveals the top hidden reasons for kidnappers. These expert professionals play an important role in solving complex cases like this.
The top 8 reasons kidnappers choose to kidnap others and how process servers in OKC and private investigators in OKC help victims seek justice are explained in this blog.
1. Ransom Money
Money is seen as the most common reason behind kidnapping. Kidnappers often target those who belong to wealthy families and business backgrounds, so they can have a large amount of money from the victims’ families. Private investigators in Oklahoma City are experts in tracking them and getting in communication to work with law enforcement for victims.
2. Personal Revenge
Kidnappers often kidnap people for personal conflicts instead of money. In such cases, people take revenge on others. It can be a partner, close friend or even a colleague. A private investigator in OKC can collect evidence and uncover the truth for justice.
3. Custody Battles
Sometimes, one parent can kidnap their child because of a custody battle, and it is known as parental kidnapping. These situations can be complicated if parents take their child outside the state. In such a situation, private investigators in Oklahoma work closely with high authorities to track kidnappers and return the child safely.
4. Human Trafficking
Human trafficking has been a major issue in the U.S., including in Oklahoma. Traffickers kidnap individuals and force them into exploitation. Quick responses from a process server in Oklahoma City can make all the difference and avoid court cases.
5. Mental Illness or Delusion
Not every kidnapper has a logic behind kidnapping. Some kidnappers have mental illnesses, and they believe it is a way to earn money from people who do not belong to them. These cases are extremely difficult and cannot be solved without the help of investigators near me who can handle complex situations.
6. Jealousy or Obsession
People who are jealous and obsessed kidnap others to gain control over them. A skilled private investigator and process server in OKC works with law enforcement to protect victims and uncover the truth.
7. Coercion or Leverage
People often kidnap others to pressure them. For example, a criminal kidnaps a business owner to get assets from them. In such high-profile cases, a process server in OK delivers legal documents to deal with the kidnappers and support victims.
8. Random Opportunity or Mistake
Some kidnappings are not planned. Some happen due to mistaken identities. Process servers and private investigators in Oklahoma City can interview witnesses and help with identifying the suspect.
Conclusion
People often get upset and emotional when they face the kidnapping of their loved ones. In such a complicated situation, it is necessary to find private investigators in OKC and a process server in Oklahoma who have experience in solving complex cases. These professionals are familiar with Oklahoma laws and work efficiently to gather evidence.
If you are searching for private investigators and process servers near me, it means you have trust in them that their services are reliable and supportable for their clients who hire them. The right team can help you everywhere, whether it’s a court matter, a child custody battle or a kidnapping case.
-

 CONSTRUCTION1 year ago
Building a Home Gym in Your Basement (7 Key Renovation Tips)
-

 BLOG2 years ago
ATFBooru: A Hub for Animated Art and Community
-

 LIFESTYLE1 year ago
Versatile Living: Stylish Indoor Outdoor Rugs with Eco-Friendly Appeal
-

 BLOG2 years ago
Fictionmania: A Deep Dive into the World of Transformative Stories
-

 LIFESTYLE1 year ago
Achieve Elegance with Chic Blue Formal Dresses and Redken Professional Hair Care for All Hair Types
-

 GAMES2 years ago
Snow Rider 3D: Unblocked Tips and Tricks for Gamers
-

 TOPIC1 year ago
Is Moving to Thousand Oaks Worth It?
-

 BLOG1 year ago
GIFHQ: A Comprehensive Guide