TOPIC
ETS2 Trailer Wielton Lowbed 1.40 – Ultimate Guide for Heavy Haulage Enthusiasts
If you’re a heavy haulage enthusiast who loves Euro Truck Simulator 2 (ETS2), you already know the thrill of transporting oversized cargo through narrow roads, steep inclines, and challenging terrains. With the ETS2 Trailer Wielton Lowbed 1.40, that experience just got better! This versatile and realistic trailer is an absolute game-changer for heavy haulage fans, offering unmatched detail and functionality.
This guide will break down everything you need to know about the Wielton Lowbed Trailer in ETS2 – from its features to heavy-haulage tips. By the end of this post, you’ll feel inspired to take on ambitious transportation projects like a pro.
What is the ETS2 Trailer Wielton Lowbed 1.40?
The ETS2 Trailer Wielton Lowbed 1.40, is a heavy-duty trailer designed for hauling oversized and heavy cargo. Known for its realistic build and customizable options, this trailer emulates real-world lowbeds used for transporting machinery, construction equipment, and industrial components. It’s perfect for players looking for a more immersive heavy-haulage experience.
Here are some key characteristics of the Wielton Lowbed Trailer:
- Designed for heavy, oversized cargo
- Comes with advanced customization options, including axle configurations
- Features accurate physics for challenging transportation scenarios
- Compatible with various ETS2 cargo packs
Whether you’re an experienced hauler or someone just stepping into the heavy-haulage world, this trailer offers the flexibility and realism needed to transform your ETS2 experience.
Why Choose the Wielton Lowbed Trailer?
Wondering why this trailer is worth adding to your fleet? Here’s why it stands out among other trailers in ETS2:
1. Realism at Its Best
The Wielton Lowbed Trailer is meticulously modeled to match real-world standards. From the detailing of the axles to the smooth cargo-loading experience, every aspect of this trailer screams realism. If you’re a player who appreciates the finer details, this trailer is a must-have.
2. Customizable Options
Not all cargo types are the same, and neither are your gameplay preferences. The trailer comes with customizable features, such as:
- Multiple axle configurations to handle varying weights
- Adjustable color options to match your fleet branding
- Compatibility with ETS2’s cargo packs for more hauling options.
3. Perfect for Heavy Cargo
Transporting massive machinery, wind turbine parts, or industrial equipment has never been so seamless. The Wielton Lowbed Trailer was designed with heavy cargo in mind, ensuring stable handling and reduced risk of tipping.
4. Enhanced Gameplay Immersion
ETS2 is all about simulating real-world trucking, and this trailer aligns perfectly with that vision. Whether you’re maneuvering tight corners or tackling uphill drives with a 50-ton load, the Wielton Lowbed Trailer turns difficult tasks into rewarding gameplay moments.
Features of ETS2 Trailer Wielton Lowbed 1.40
This trailer is packed with features that appeal to both hardcore simulators and casual players alike. Here’s a closer look at what makes it a fan favorite:
1. Advanced Axle Configurations
The Wielton Lowbed Trailer offers up to 4 axle configurations, making it suitable for a variety of cargo weights and sizes. The choice of axles also gives you flexibility in balancing weight across your trailer, ensuring a stable ride through tough terrain.
2. Custom Skins and Designs
Who doesn’t love a trailer that matches their style? With customizable skins, colors, and designs, you can personalize your Lowbed Trailer to stand out. This feature is particularly loved by ETS2 players who enjoy the creative aspect of trucking simulations.
3. Realistic Physics
From the moment you hitch this trailer to your truck, you’ll notice the physics at play. Whether it’s the weight distribution or the realistic suspension, the Wielton Lowbed Trailer challenges you to adapt and improve your driving skills. Its physics accuracy adds to the authenticity of the game.
4. Compatible with the 1.40 Lighting Update
The ETS2 1.40 update introduced improved graphics and lighting for a more immersive experience. The Wielton Lowbed Trailer is fully compatible with these enhancements, looking stunning in both day and night drives.
5. Supports DLC Cargo Packs
Already own ETS2’s Heavy Cargo or Special Transport DLC? The Wielton Lowbed Trailer is compatible with these packs, giving you access to an extended range of challenging loads.
Tips for Heavy Haulage Mastery with the Wielton Lowbed Trailer
Transporting heavy cargo isn’t for the faint of heart. But with these tips, you’ll master the art of heavy haulage in no time:
1. Plan Your Route Ahead
Before accepting a heavy haulage contract, take the time to review the route. Look out for steep terrains, narrow roads, and low-clearance bridges. ETS2’s in-game map provides all the details you need to make smarter driving decisions.
2. Perfect Your Manoeuvring Skills
Heavy trailers like the Wielton Lowbed require extra attention, especially when reversing or navigating tight corners. Practice coupling and uncoupling the trailer to get comfortable handling it.
3. Monitor Your Speed
It’s tempting to put the pedal to the metal, but heavy loads demand cautious driving. Gradual acceleration and controlled braking are your best friends when hauling oversized cargo.
4. Use the Right Truck
Pair your Wielton Lowbed Trailer with a powerful truck that can handle its weight. Something with a high horsepower engine and advanced torque is ideal for the job. Look into trucks from Scania or Volvo for the best heavy-haulage results.
5. Maintain Your Equipment
Keep an eye on your truck’s and trailer’s maintenance stats. Heavy hauling puts additional pressure on your vehicle, so regular checkups are crucial for a smooth ride.
6. Optimize for the Weather
Weather changes in ETS2 impact how your trailer handles. Rain, for example, can reduce traction, making it harder to brake. Use weather-appropriate equipment and adjust your driving style to match conditions.
Why Heavy Haulage Enthusiasts Love the Wielton Lowbed Trailer
ETS2’s Wielton Lowbed Trailer 1.40 isn’t just another trailer—it’s an experience. With its combination of realistic design, advanced features, and immersive gameplay opportunities, it has become a favorite among the heavy haulage community.
From novice players exploring heavy cargo for the first time to experienced haulers chasing a challenge—the Wielton Lowbed Trailer offers something for everyone. It’s more than a tool for transporting goods; it’s a catalyst for adrenaline-pumping trucking adventures.
Bring the Wielton Lowbed Trailer to Your ETS2 Fleet
Are you ready for your next challenge? Download the Wielton Lowbed Trailer and unlock a new level of gameplay. With its cutting-edge features, realistic handling, and customizability, this trailer promises to redefine your ETS2 experience.
Don’t miss the chance to elevate your trucking game today. Start hauling smarter, faster, and better with the ETS2 Wielton Lowbed Trailer 1.40.
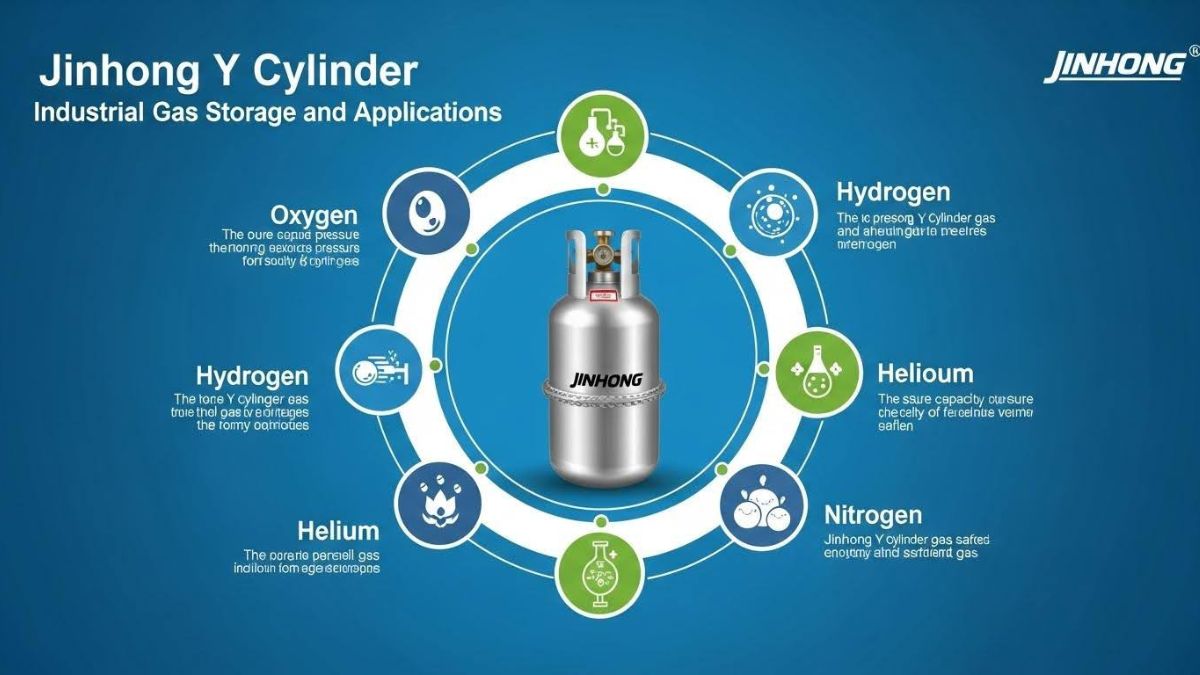
In industrial and laboratory environments, the need for reliable gas storage solutions is crucial. Among the many formats available, the Jinhong Y cylinder stands out as a high-capacity, high-pressure gas container designed for efficient storage and transport of specialty gases. With an emphasis on purity, performance, and safety, Y cylinders are trusted by industries ranging from semiconductors and laboratories to petrochemical plants and aerospace operations.
This article takes a deep dive into the design, specifications, applications, and advantages of the Jinhong Y cylinder, while also shedding light on the broader offerings of Jinhong, a global player in the specialty gas and cylinder market.
What Is a Y Cylinder?
A Y cylinder—sometimes referred to as a “ton container” or “T cylinder”—is a large, horizontal gas cylinder used to store and transport gases in bulk, especially under high pressure. These cylinders are ideal for gases that are either costly or consumed in large volumes, such as:
- Sulfur hexafluoride (SF₆)
- Silane (SiH₄)
- Ammonia (NH₃)
- Chlorine (Cl₂)
- Hydrogen chloride (HCl)
Y cylinders are constructed using high-strength steel or other reinforced materials and come equipped with pressure relief valves, gas-specific valve types, and neck threads tailored to the properties of the stored gas.
Dimensions and Specifications of Y Cylinders
Though specifications may vary slightly by manufacturer, Jinhong’s Y cylinders typically follow global standards for gas container design. Here are some standard specifications:
| Specification | Typical Value |
| Water Capacity | 49.5 – 52.5 liters |
| Working Pressure | Up to 150 bar (depending on gas) |
| Material | Seamless steel |
| Cylinder Orientation | Horizontal |
| Cylinder Weight | ~90 – 110 kg (empty) |
| Certification Standards | ISO9809, DOT, TPED, GB, etc. |
These cylinders are built to resist corrosion, handle hazardous contents, and ensure long-term durability under demanding industrial conditions.
Why Choose the Jinhong Y Cylinder?
Jinhong, a trusted name in the specialty gas industry, has a reputation for producing high-quality gas cylinders and supplying ultra-high purity gases to global markets. Their Y cylinders stand out due to the following reasons:
1. High Storage Capacity
Compared to standard industrial cylinders, Y cylinders provide significantly more gas per unit, reducing the frequency of cylinder changes and minimizing downtime.
2. Safety Compliance
Every Jinhong Y cylinder complies with international safety codes, ensuring that gases are safely stored and transported. From valve compatibility to explosion-proof construction, these cylinders are designed for handling toxic, corrosive, or flammable gases.
3. Versatility Across Industries
Whether it’s used in a semiconductor cleanroom or a chemical processing facility, the Y cylinder can handle diverse gases without compromising purity or safety.
4. Customization Options
Jinhong offers a range of customizable features for its Y cylinders, including:
- Valve type (Diaphragm, Ball, Needle)
- Gas purity levels
- Color-coded coatings
- Stamped serial numbers for traceability
Industrial Applications of Y Cylinders
Y cylinders are essential in sectors where gas consumption is high and continuous. Let’s explore their role across a few industries:
Semiconductor Industry
Gases like silane (SiH₄), ammonia (NH₃), and hydrogen chloride (HCl) are delivered in Y cylinders to semiconductor fabs. Their large volume capacity ensures consistent feedstock supply for chemical vapor deposition (CVD) and etching processes.
Chemical Manufacturing
In chemical synthesis and polymer production, bulk gases are used in continuous-flow reactors. Y cylinders reduce gas replacement frequency and ensure stable operations.
Power and Utilities
Sulfur hexafluoride (SF₆) is a common gas used for insulation in high-voltage switchgear. SF₆ is often stored in Y cylinders due to the quantity required for substations and grid systems.
Metallurgy and Welding
Some specialty gases used in high-end alloy processing and thermal spray coatings are stored in Y cylinders to maintain purity and minimize contamination risks.
Jinhong: Beyond Cylinders
Jinhong isn’t just a cylinder manufacturer—it’s a global supplier of industrial and specialty gases. From argon to acetylene, Jinhong provides gases for welding, medical, research, and semiconductor sectors.
Interested in pricing on one of Jinhong’s most popular gases? You can explore cost breakdowns for commonly used products like argon here: Jinhong
This pricing insight is helpful whether you’re sourcing gases in bulk or planning an industrial-scale project.
Maintenance and Safety Tips
Proper handling and maintenance of Y cylinders are essential to avoid hazardous situations:
- Store upright in well-ventilated areas
- Use regulators and fittings specific to the gas type
- Perform leak checks before each use
- Never attempt to refill or modify cylinders without professional certification
- Always follow SDS (Safety Data Sheet) instructions for each gas
Jinhong provides comprehensive safety documentation and training resources for all its products, including Y cylinders and the gases they carry.
Cost Considerations
While Y cylinders require a higher upfront cost compared to standard cylinders, they offer better cost-efficiency over time due to:
- Fewer cylinder changes
- Reduced shipping and handling
- Lower downtime in continuous processes
In bulk supply scenarios or semiconductor facilities, Y cylinders can lead to significant cost savings when calculated on a per-liter or per-gram gas usage basis.
Global Standards and Certification
Jinhong’s cylinders conform to key international standards, including:
- ISO 9809 for seamless steel cylinders
- DOT/TC certification for U.S. and Canadian markets
- TPED/ADR compliance for Europe
- GB standards for China
This makes them an ideal choice for companies operating in regulated industries and across global markets.
Conclusion
The Jinhong Y cylinder represents a critical innovation in industrial gas storage, offering bulk capacity, high-pressure tolerance, and unmatched safety. Whether you’re in semiconductor fabrication, chemical processing, or energy infrastructure, this cylinder format is built to support high-performance applications while ensuring operational efficiency.
Jinhong’s commitment to quality, global distribution, and innovation in specialty gases has made them a go-to supplier for businesses around the world. If you’re looking to invest in reliable, certified, and high-capacity gas storage, the Y cylinder may be exactly what your operation needs.

Motorcycle crashes impact lives. When poor road conditions cause these accidents, you may wonder about filing a claim. Understanding your rights helps you make informed decisions. Bad roads, such as those with potholes or debris, present unique challenges for riders. These hazards can lead to devastating outcomes. You may think, “Who is responsible?” That’s a fair question. State or local governments often manage road upkeep. If they neglect maintenance, they might be accountable. But proving this requires evidence and expertise. Consulting experienced professionals is crucial. Groth Law Accident Injury Attorneys is a trusted resource in such situations. They guide you through the legal process. Gathering evidence, such as photos or witness testimonies, strengthens your case. Awareness of these steps can protect your future. You deserve justice when harmed due to someone else’s negligence. Understand your options. Knowledge empowers you to seek rightful compensation. Let’s uncover what action you can take.
Your Legal Rights and Responsibilities
When faced with a motorcycle crash caused by poor road conditions, knowing your rights is the first step toward resolution. Do you have a claim? Yes, if negligence on the part of road maintenance entities contributed to the crash. It’s critical to determine if the government is responsible for the road’s condition. Understanding regulations helps you establish a claim. For instance, Federal Highway Administration provides guidelines on road maintenance. Knowing these can help you understand where negligence occurred.
Proving Negligence in Motorcycle Crashes
To succeed in a claim, you must prove negligence. This involves showing that the responsible party knew or should have known about the hazard. Gathering evidence is essential. You need clear proof that links the road condition to your crash. Photos, reports, and witness statements play a vital role. Document everything, including the location, time, and specific conditions of the road. These details create a strong foundation for your claim.
Steps to File a Claim
Filing a claim involves several steps. First, report the accident to authorities. Accurate police reports can aid your case. Then, seek medical attention. Health records not only ensure your well-being but also serve as evidence of your injuries. Afterward, consult legal experts. They guide you through the intricate legal process. Experts can help you notify the responsible government entity of your intent to file a claim. It’s important to meet all legal deadlines, as missing them can jeopardize your case.
Understanding Liability
Determining liability in these cases can be complex. The table below outlines possible responsible parties and their typical maintenance duties:
| Responsible Party | Typical Maintenance Duties | When Liability May Apply |
| Local Governments | Maintain city streets | When city roads are neglected |
| State Governments | Maintain highways | When highways have hazards |
| Federal Agencies | Oversee federal routes | When federal routes are unsafe |
Importance of Expert Guidance
Expert guidance is invaluable. Legal professionals understand the nuances of such claims. They assess your situation and offer advice tailored to your needs. With their help, you can navigate the complexities of the legal system. This support can be a significant relief, ensuring your rights are protected.
Taking Action
Act promptly. Time matters in these cases. Evidence can disappear, and legal deadlines can pass quickly. By acting swiftly, you preserve your rights and enhance your chances of success. Stay informed and proactive throughout the process. Your diligence can make a substantial difference in the outcome.
Conclusion
Motorcycle crashes are life-altering events. When poor road conditions cause these incidents, you have the right to seek justice. Proving negligence requires careful documentation and expert assistance. By understanding your rights and taking informed steps, you can pursue rightful compensation. Remember, you are not alone. There are resources and professionals ready to guide you through this challenging time. Your well-being and future matter. Take control and act today.

Kidnapping is a terrifying crime that can happen to anyone. Children and adults are often targeted. It is necessary to communicate with private investigators in OKC and process servers near me who have worked on multiple kidnapping cases. Their knowledge about kidnapping cases reveals the top hidden reasons for kidnappers. These expert professionals play an important role in solving complex cases like this.
The top 8 reasons kidnappers choose to kidnap others and how process servers in OKC and private investigators in OKC help victims seek justice are explained in this blog.
1. Ransom Money
Money is seen as the most common reason behind kidnapping. Kidnappers often target those who belong to wealthy families and business backgrounds, so they can have a large amount of money from the victims’ families. Private investigators in Oklahoma City are experts in tracking them and getting in communication to work with law enforcement for victims.
2. Personal Revenge
Kidnappers often kidnap people for personal conflicts instead of money. In such cases, people take revenge on others. It can be a partner, close friend or even a colleague. A private investigator in OKC can collect evidence and uncover the truth for justice.
3. Custody Battles
Sometimes, one parent can kidnap their child because of a custody battle, and it is known as parental kidnapping. These situations can be complicated if parents take their child outside the state. In such a situation, private investigators in Oklahoma work closely with high authorities to track kidnappers and return the child safely.
4. Human Trafficking
Human trafficking has been a major issue in the U.S., including in Oklahoma. Traffickers kidnap individuals and force them into exploitation. Quick responses from a process server in Oklahoma City can make all the difference and avoid court cases.
5. Mental Illness or Delusion
Not every kidnapper has a logic behind kidnapping. Some kidnappers have mental illnesses, and they believe it is a way to earn money from people who do not belong to them. These cases are extremely difficult and cannot be solved without the help of investigators near me who can handle complex situations.
6. Jealousy or Obsession
People who are jealous and obsessed kidnap others to gain control over them. A skilled private investigator and process server in OKC works with law enforcement to protect victims and uncover the truth.
7. Coercion or Leverage
People often kidnap others to pressure them. For example, a criminal kidnaps a business owner to get assets from them. In such high-profile cases, a process server in OK delivers legal documents to deal with the kidnappers and support victims.
8. Random Opportunity or Mistake
Some kidnappings are not planned. Some happen due to mistaken identities. Process servers and private investigators in Oklahoma City can interview witnesses and help with identifying the suspect.
Conclusion
People often get upset and emotional when they face the kidnapping of their loved ones. In such a complicated situation, it is necessary to find private investigators in OKC and a process server in Oklahoma who have experience in solving complex cases. These professionals are familiar with Oklahoma laws and work efficiently to gather evidence.
If you are searching for private investigators and process servers near me, it means you have trust in them that their services are reliable and supportable for their clients who hire them. The right team can help you everywhere, whether it’s a court matter, a child custody battle or a kidnapping case.
-

 LIFESTYLE2 years ago
Versatile Living: Stylish Indoor Outdoor Rugs with Eco-Friendly Appeal
-

 BLOG2 years ago
ATFBooru: A Hub for Animated Art and Community
-

 CONSTRUCTION2 years ago
Building a Home Gym in Your Basement (7 Key Renovation Tips)
-

 LIFESTYLE2 years ago
Achieve Elegance with Chic Blue Formal Dresses and Redken Professional Hair Care for All Hair Types
-

 TOPIC1 year ago
Moving to Scottsdale AZ: Things to Know
-

 TOPIC1 year ago
Is Moving to Thousand Oaks Worth It?
-
 TOPIC1 year ago
A Comprehensive Guide To Appliance Recycling In Honolulu, HI
-

 BLOG2 years ago
Fictionmania: A Deep Dive into the World of Transformative Stories